
The Girl in the Window sends Dan into a locked, derelict house full of scattered clues, and one of the first real bottlenecks every new player hits is the bottom drawer beside the couch. It looks ordinary, but it refuses to open until you have assembled a small chain of items from completely different rooms. The Girl in the Window locked drawer walkthrough matters because that drawer is what eventually frees the crowbar, and the crowbar is what unlocks the front door later. Skip the drawer and the whole escape stalls within twenty minutes of starting a fresh run.
This guide covers every step needed to crack the locked drawer, from the dark-room wall clue to the notebook symbol translation and the final cheese-on-mouse-trap trick that finishes the puzzle. It also walks through what the crowbar does after the drawer pops open, plus how the crucifix chain connects to the same inventory. The walkthrough below was assembled from a community-tested full game walkthrough and cross-checked with the official Steam store page for item names and room locations, so the item names and order below match the published 2026 version of the game.
Reading the Wall Clue in the Dark Room
The first piece of the locked drawer walkthrough has nothing to do with the drawer itself. Before any key or code will make sense, you have to visit the dark room on the ground floor and study the symbols scratched into the plaster. This is the room that scares a lot of new players because the lights are off, but the puzzle is purely visual: a vertical strip of four carved symbols sits just left of the doorway, and each one corresponds to a single object scattered elsewhere in the house.
Reading the vertical strip from top to bottom, the four carvings line up exactly in the order the drawer puzzle will later demand, so a quick mental snapshot now saves a backtracking loop through the kitchen and bathroom once you finally crack the locked drawer — a small but time-saving detail that most first-time players miss until they return upstairs empty-handed.
| Position | Carved Symbol | Matches Inventory Item |
|---|---|---|
| Top | Wine glass | Glass of wine (kitchen counter) |
| Upper middle | Cross | Small crucifix (drawer under the bed) |
| Lower middle | Curved mirror | Hand mirror (bathroom shelf) |
| Bottom | Clove of garlic | Garlic bulb (kitchen bowl) |
Players tend to assume the order is the only thing that matters, but the wall clue actually does double duty. It tells you which four items to collect and also hints at the sequence in which those items need to be placed into the locked bottom drawer once the drawer finally opens. The full the girl in the window locked drawer walkthrough therefore starts with a lap of the house, not with the drawer itself.
What the Wall Clue Does Not Tell You
The carved wall is missing one critical piece of information. It does not show you the four-digit code that opens the drawer; the code is encoded separately in the notebook on the table in the same room. The notebook page is a small chart that maps each carved symbol to a single digit. A common rookie mistake is to read the wall, rush to the drawer, and try random numbers — every digit from that notebook is between 0 and 9, so brute force takes far longer than just reading the page.
Finding the Four Wall-Clue Items Around the House
With the wall decoded, the next phase of the the girl in the window locked drawer walkthrough is a scavenger run. The four objects — wine, crucifix, mirror, garlic — are placed in rooms that first-time players often leave half-explored. A clean sweep is essential because the crowbar is gated behind this exact four-item set.
| Item | Room | Surface / Container | Notes |
|---|---|---|---|
| Glass of wine | Kitchen | Counter near the stove | Pick up before the cat scene if possible |
| Small crucifix | Bedroom | Bottom drawer under the bed (a different drawer from the locked one) | Opens freely, no code |
| Hand mirror | Bathroom | Shelf above the sink | Used again later in the mirror puzzle |
| Garlic bulb | Kitchen | Bowl on the dining table | Tied into the vampire-portrait subplot |
The crucifix is the easiest to overlook because the bedroom contains two drawers: the locked one by the couch is not here, but a separate unlocked drawer under the bed hides the small cross. Grab it early because the crucifix is also reused during the wire puzzle walkthrough and the crucifix walkthrough segment that comes after the drawer opens.
Why the Order You Pick Items Up Matters
Inventory order in The Girl in the Window is positional, not alphabetical, so the first item tapped goes into the top slot of the inventory grid. The the girl in the window locked drawer walkthrough works best when items are picked up in the wall-clue order (wine, crucifix, mirror, garlic). That way, when the drawer is finally opened, you can drag the four items into the drawer slots in the same top-to-bottom order without reshuffling. It saves roughly two minutes on a clean run and prevents the most common combination error.
Decoding the Notebook Code Page
The notebook sits on the round table in the dark room, just below the carved wall. It looks like a school notebook that has been flipped open to a hand-drawn chart. Each carved symbol gets a single number next to it, and the four-digit drawer code is read by stacking the numbers in the same top-to-bottom order as the wall symbols.
A typical notebook chart in the current build lays out the four carved wall symbols in a single vertical column, each paired with a hand-written digit to its right, so the page functions as a one-to-one lookup table rather than a cipher or math puzzle. In practice, players read straight down the left-hand list of icons (wine glass, cross, mirror, garlic) and copy the matching number on the right to form the locked drawer code in that exact sequence. This direct symbol-to-digit mapping is what makes the notebook the single most reliable the girl in the window locked drawer walkthrough asset, since there is no rotation, subtraction, or symbol-swap step to misread in the dark room.
| Symbol | Digit (sample) | Real digit (randomized per run) |
|---|---|---|
| Wine glass | 3 | 0–9, varies |
| Cross | 1 | 0–9, varies |
| Mirror | 8 | 0–9, varies |
| Garlic | 4 | 0–9, varies |
The exact four-digit code is randomized every playthrough according to community testing on the Steam beta branch, so no single hard-coded code survives a second run. What stays constant is the order: wine → cross → mirror → garlic, top to bottom. If you enter the digits in that order, the drawer pops. If you reverse them, the keypad resets and a hint counter ticks down, which is the only reason players ever burn through their hint allowance on this step.
Reading the Notebook Without Spoiling the Twist
Some players prefer to skip the notebook entirely and brute-force the four-digit code. With 10,000 combinations and a soft lockout after each failed attempt, that path is strictly worse than reading the page. The notebook is not a spoiler; it is one of the core puzzle instruments in the game, alongside the photo, the diary, the mirror, and the portrait, and the wire puzzle walkthrough covers how the same notebook chart loops back into a later puzzle chain.
Opening the Locked Drawer and Freeing the Crowbar
With four items in hand and the four-digit code in mind, the locked drawer beside the couch is finally ready. Tap the drawer to zoom in, enter the code on the keypad, and the panel slides back to reveal a shallow wooden slot. Inside the slot sits the metal crowbar, a short heavy tool that looks bent at one end. The drawer itself is now an empty container, but the locked drawer walkthrough does not end with grabbing the crowbar: the drawer is also the place where you place the four wall-clue items in sequence.
| Step | Action | What Happens |
|---|---|---|
| 1 | Tap the locked drawer | Zoom-in panel appears with a 4-digit keypad |
| 2 | Enter the notebook code in wall order | Drawer slides open, crowbar visible |
| 3 | Tap the crowbar | Adds Crowbar to inventory |
| 4 | Drag wine into top slot | Subtle sound cue, slot glows |
| 5 | Drag crucifix into second slot | Slot glows |
| 6 | Drag mirror into third slot | Slot glows |
| 7 | Drag garlic into bottom slot | Final chime, drawer seals again |
Once all four slots light up, the drawer quietly reseals itself and the four items disappear from the inventory. That is intentional: the items are consumed by the puzzle, and the only permanent reward is the crowbar. The the girl in the window crowbar walkthrough segment therefore really begins at this moment, because the crowbar is the new key that opens a different locked container elsewhere in the house.
What the Crowbar Unlocks Next
The crowbar is the single most important tool in the early game. According to the Dark Dome premium content trailer, the crowbar is the same item that pries open the wine-room floorboards and the upstairs hatch, both of which gate access to the upstairs bedroom and the final code. Players who try to push forward without grabbing the crowbar from the drawer will hit a hard wall at roughly the thirty-minute mark, which is why so many first-time runs stall at the locked drawer step.
Setting the Mouse Trap With Cheese
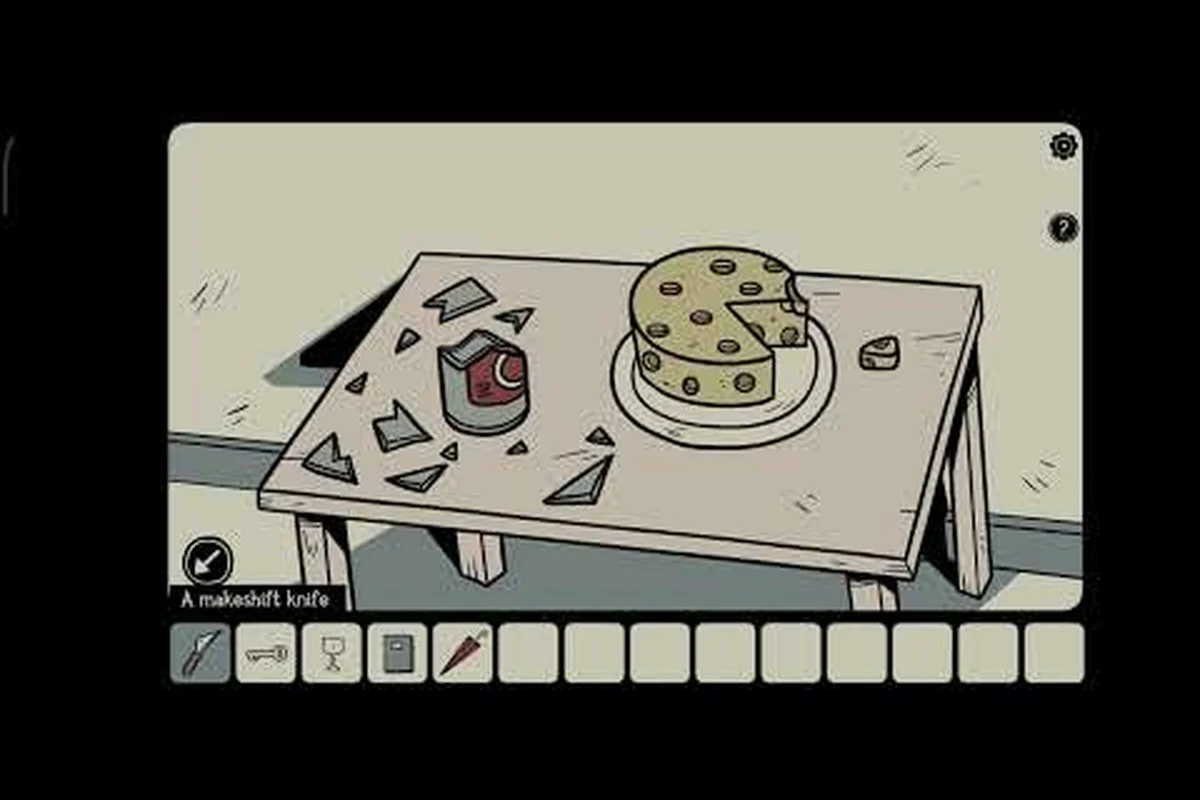
After the crowbar is in the inventory, the the girl in the window locked drawer walkthrough branches into a small side puzzle that returns a second key tool. The mouse trap sits on a low shelf in the kitchen, baited but unset, and the matching wedge of cheese is sitting on the dining table next to the garlic. Combining the cheese with the trap arms it; placing the armed trap on the floor in the dark room spawns a small cutscene and eventually drops a small brass key that opens a separate drawer near the front door.
The the girl in the window mouse trap walkthrough and cheese walkthrough are short, but they tie directly into the locked-drawer flow because the brass key is needed to open the drawer under the radio in the living room. That drawer holds the wire, which is the central item in the next big puzzle chain. Skipping the mouse-trap detour is possible, but it locks the player out of the wire and the rest of Act 2.
| Step | Action | Result |
|---|---|---|
| 1 | Pick up the wedge of cheese from the dining table | Adds Cheese to inventory |
| 2 | Pick up the mouse trap from the kitchen shelf | Adds Mouse Trap to inventory |
| 3 | Combine Cheese + Mouse Trap in inventory | Armed Mouse Trap item |
| 4 | Place armed trap on the dark-room floor | Triggers short cutscene |
| 5 | Return to dark room after the scene | Small brass key is on the floor |
| 6 | Use brass key on the drawer under the radio | Reveals the wire |
Why the Mouse Trap Step Is Easy to Miss
The armed trap looks visually identical to the unarmed version unless the player zooms in. New players often set the trap on the wrong floor tile, or they walk out of the dark room before the cutscene finishes, which silently cancels the trigger. The save guide recommends saving immediately before placing the trap, so a misfire can be undone with a single reload instead of restarting the whole Act 1 sequence.
Connecting the Crucifix Chain to the Crowbar Path
The crucifix that the player placed into the locked drawer is one half of a longer thematic chain. The the girl in the window crucifix walkthrough picks up later, in the upstairs bedroom, where a second larger crucifix has to be mounted on the wall to reveal a hidden compartment. That compartment contains the final key that opens the upstairs hatch, which is the same hatch the crowbar helps to pry open from below. The crucifix chain is therefore not optional decoration; it is a structural part of the same escape route the crowbar enables.
| Crucifix | Location | Used For |
|---|---|---|
| Small crucifix | Bottom drawer under the bed (freely openable) | Placed in the locked-drawer slot |
| Large crucifix | Hidden compartment upstairs (found later) | Mounted on the upstairs wall |
Both crucifixes are required for the 100% completion route, and the achievement checklist tracks them as two separate collectibles. The crucifix chain also feeds into the wider Hidden Town mythology, because the same crucifix motif shows up in later Dark Dome entries. The full walkthrough covers the entire chain in proper order, but the locked-drawer step is where the small crucifix enters the player's inventory for the first time.
Common Mistakes When Handling the Crucifix
The most common crucifix error is placing the wrong crucifix upstairs. Once the small crucifix is consumed by the locked drawer, it is gone from the inventory permanently. Players who forget this often try to use the small crucifix on the upstairs wall mount, which does nothing. The upstairs mount only accepts the large crucifix from the hidden compartment, so the small cross has to be sacrificed in the locked drawer without regrets.
Putting the Locked Drawer Walkthrough in the Full Route
The locked-drawer sequence is a small but mandatory chapter of the larger escape, and it sits roughly at the 25% mark of Act 1. Think of it as a gating puzzle: every item you collect before it — the notebook code from the dark room, the small crucifix, the hand mirror, and the four kitchen supplies (wine, garlic, cheese, mouse trap) — feeds directly into the code-and-place interaction, so arriving under-prepared forces a backtrack through earlier rooms. The community-tested flow below assumes that pre-drawer order, which is why step 6 doubles as both the code entry and the item-placement node before the crowbar unlocks the rest of the route.
| Order | Location | Key Pickup |
|---|---|---|
| 1 | Front door area | Inspect the couch, spot the locked drawer |
| 2 | Dark room | Read wall clue, copy notebook code |
| 3 | Bedroom | Grab the small crucifix |
| 4 | Kitchen | Pick up wine, garlic, cheese, mouse trap |
| 5 | Bathroom | Pick up the hand mirror |
| 6 | Locked drawer | Enter code, take crowbar, place four items |
| 7 | Dark room | Place armed mouse trap, grab brass key |
| 8 | Living room | Use brass key on radio drawer, grab wire |
After the wire is in hand, the the girl in the window locked drawer walkthrough is officially complete. The crowbar, brass key, and four wall-clue items have all been collected, and the rest of the escape is a separate puzzle chain that flows into the spoiler-free walkthrough for Act 2 and the final door.
When to Save Around the Locked Drawer
Because the drawer is irreversible once all four slots are filled, saving right before placing the last item is the safest checkpoint in the entire early game. The how-to-save guide covers platform-specific save buttons, but the rule of thumb is: save after the crowbar is collected, save after the mouse-trap cutscene, and save one more time right before the final slot on the drawer. Three saves around a single puzzle sounds excessive, but Act 1 has no other natural checkpoint, so the locked drawer is the single highest-leverage save point in the whole run.
Troubleshooting the Locked Drawer Step
Even with the right code and the right items, a few small issues can block the the girl in the window locked drawer walkthrough. The table below covers the four most common stalls reported by players on community threads, plus the fastest fix for each.
| Symptom | Likely Cause | Fastest Fix |
|---|---|---|
| Drawer does not accept the code | Digits entered in reverse wall order | Clear the keypad, re-enter top-to-bottom |
| Item does not snap into drawer slot | Item picked up after the wall-clue order | Drop and re-pick the item so it lands in the correct slot |
| Crowbar missing from inventory after drawer opens | Crowbar was consumed by an earlier failed attempt | Restart the run, the crowbar is unique |
| Mouse trap cutscene never triggers | Trap placed on the wrong floor tile | Save, reload, retry on the center tile of the dark room |
If the keypad simply refuses to accept any input, the drawer is probably already in its "open" state from a previous attempt, and re-entering the room from the front hallway resets it. The game's save system is generous with checkpoints around this puzzle, so a reload is almost always faster than debugging in place.
What to Do If the Wall Clue Is Unreadable
On some phone screens the carved wall symbols render very dark, especially in the dark room before the player finds the light switch. The fix is to tap the light switch by the doorway first, return to the wall, and the symbols are clearly visible. According to community reports on the Dark Dome subreddit, the switch is sometimes skipped because new players assume the dark room is a horror set piece rather than a puzzle room, and they walk out before reading the clue.
Frequently Asked Questions
Where is the locked drawer in The Girl in the Window?
The locked drawer is the bottom drawer of the small wooden cabinet beside the couch in the front living room. It has a four-digit keypad and a thin slot above the handle, and it only opens after the player enters the four-digit code copied from the notebook in the dark room. Once the code is entered correctly, the drawer slides open to reveal the crowbar, which is the key early-game tool needed for the rest of the escape.
What code opens the locked drawer?
The four-digit code is randomized every run and is read from the notebook chart in the dark room, with each carved wall symbol mapped to a single digit. The code must be entered in the same top-to-bottom order as the wall symbols — wine, cross, mirror, garlic — or the keypad will reject the input. No static code works across multiple playthroughs because the digits are reshuffled on every fresh save.
Do I need the four wall-clue items to open the drawer?
You only need the notebook code to pop the drawer open. The four wall-clue items — wine, crucifix, mirror, garlic — are required for the second half of the puzzle, which is the slot sequence inside the drawer that consumes those four items. Skipping the slot sequence still gives the player the crowbar, but the achievement tied to the locked drawer will not register, and the later crucifix chain will be missing a critical step.
What does the mouse trap do in the locked drawer walkthrough?
The mouse trap is a small side puzzle that produces the brass key needed to open the drawer under the radio in the living room. After combining the trap with the cheese wedge from the dining table, the armed trap has to be placed on the dark-room floor to trigger a short cutscene. The brass key appears on the floor when the player returns, and it unlocks the radio drawer where the wire is hidden, which is the central item in the next major puzzle chain.
Can the locked drawer be skipped entirely?
The locked drawer cannot be skipped because the crowbar is the only tool that can pry open the upstairs hatch and the wine-room floorboards. Without the crowbar, the Act 2 transition is unreachable and the game effectively ends in the living room. The mouse trap, brass key, and crucifix steps are also soft-gated by the same drawer, so the locked drawer is the single most important puzzle in Act 1.